Sunday 29 October 2023

October 29, 2023

Beet Soup // Beet Soup Recipe // Beetroot Soup Recipe // Benifits Of Beetroot

 Baking And Cooking Hacks


Title: Classic Beetroot Soup (Borscht) Recipe
Introduction:
Beetroot soup, or borscht, is a beloved and vibrant dish originating from Eastern Europe, particularly Russia, Ukraine, and Poland. It's a hearty and nutritious soup that's perfect for any time of the year. This comprehensive recipe will help you create a rich and flavorful borscht that's both delicious and visually appealing.
**Ingredients:**
For the Soup:
- 4 medium-sized beetroots, peeled and diced
- 2 large potatoes, peeled and diced
- 1 onion, finely chopped
- 2 cloves of garlic, minced
- 4 cups (1 liter) vegetable or chicken broth
- 2 tablespoons olive oil
- 2 tablespoons white wine vinegar or apple cider vinegar
- 1 bay leaf
- 1 teaspoon sugar (optional)
- Salt and black pepper to taste
For Garnish:
- Sour cream or Greek yogurt
- Fresh dill or chives, finely chopped
**Instructions:**
**1. Prepare the Beetroots and Vegetables:**
- Start by peeling and dicing the beetroots and potatoes. Wearing gloves when handling beets can prevent staining your hands.
**2. Sauté the Onions and Garlic:**
- In a large pot, heat the olive oil over medium heat. Add the chopped onion and minced garlic, and sauté until the onion becomes translucent, usually taking about 3-5 minutes.
**3. Add Beetroots and Potatoes:**
- Add the diced beetroots and potatoes to the pot. Sauté them for about 5 minutes, stirring occasionally.
**4. Pour in the Broth:**
- Add the vegetable or chicken broth and the bay leaf to the pot. Bring the mixture to a boil, then reduce the heat to a simmer.
**5. Simmer and Cook:**
- Allow the soup to simmer for about 30-40 minutes or until the beetroots and potatoes are tender. Cooking time may vary based on the size of your beetroot and potato pieces.
**6. Blend the Soup:**
- After the vegetables are tender, remove the bay leaf from the pot. You can use an immersion blender or transfer the soup in batches to a blender and puree it until smooth. Exercise caution when blending hot liquids, as they can splatter. If you have an immersion blender, it's the safer and more convenient option.
**7. Season and Add Vinegar:**
- Return the pureed soup to the pot and season it with salt and black pepper to taste. If you prefer a slightly tangy flavor, add the vinegar. You can adjust the amount of vinegar to your liking. If the soup is too earthy for your taste, you can add a teaspoon of sugar to balance the flavors.
**8. Reheat and Serve:**
- Reheat the soup over low heat, stirring occasionally until it's hot. Taste and adjust the seasoning if necessary.
**9. Garnish and Serve:**
- Ladle the beetroot soup into bowls and garnish with a dollop of sour cream or Greek yogurt and a sprinkle of fresh dill or chives.
**Variations:**
- Meat-Based Borscht: You can add beef, pork, or sausage to your borscht for a heartier version. Simply brown the meat in the pot before adding vegetables and broth, and let it simmer until the meat is tender.
- Vegetarian/Vegan Borscht: Omit meat and use vegetable broth for a vegetarian or vegan version. You can also add beans or lentils for protein.
- Chilled Borscht: Refrigerate the soup and serve it cold during hot summer months. Chilled borscht is a refreshing option.
- Serve with Bread: Traditional Eastern European bread, such as rye or pumpernickel, complements borscht nicely.
- Extra Toppings: Consider additional garnishes like hard-boiled eggs, pickles, or a squeeze of fresh lemon juice.
In conclusion, this beetroot soup recipe allows you to prepare a delicious and versatile dish that's loved in many parts of the world. Its rich, deep color and wonderful flavors make it a great addition to your culinary repertoire. Whether served hot or cold, borscht is a nutritious and flavorful soup that's sure to please your taste buds. Enjoy making and savoring this classic dish!




Benifits Of Beetroot


Thursday 20 July 2023

July 20, 2023

Carrot Soup For Weight Loss // Carrot and Lentil soup // Benifits Of Carrot


Carrot Soup For Weight Loss

Carrots are packed with fibers, Fiber takes longest time to digest and therefore gives feeling of fullness and help you to not munch on junck food. Carrots are good for digestive health. Carrots are low in calories. People who want to do weight loss diet are advised to keep eye on calories so you can easyly include carrot soup in your diet.

 Heat the oil in pressure cooker. Add 1 tsp cumin, chopped onion, chopped tomato, chopped carrots, and split red lentil. Cook for 2 to 3 min, Add salt and pepper to taste. Add 3 to 4 cups of water and cook for 2 whistle. Blend the soup and serve hot!


Title: Creamy Carrot Soup Recipe


Introduction:


Creamy carrot soup is a comforting and nutritious dish that's perfect for any season. This comprehensive recipe will guide you through the process of making a velvety and flavorful carrot soup, complete with step-by-step instructions, variations, and useful tips.
**Ingredients:**
For the Carrot Soup:
- 2 lbs (about 900g) fresh carrots, peeled and chopped
- 1 large onion, chopped
- 2 cloves garlic, minced
- 2 tablespoons olive oil
- 4 cups (1 liter) vegetable broth
- 1 teaspoon ground cumin
- 1/2 teaspoon ground coriander
- 1/4 teaspoon ground ginger
- 1/4 teaspoon ground nutmeg
- Salt and black pepper to taste
- 1 cup (240ml) heavy cream or coconut milk (for a dairy-free option)
For Garnish:
- Fresh herbs (such as parsley or chives)
- Croutons or toasted bread
- Sour cream or Greek yogurt
**Instructions:**
**1. Prep the Carrots and Vegetables:**
- Start by peeling and chopping the carrots into small, even-sized pieces. This ensures even cooking and a smoother texture for your soup.
**2. Sauté the Onions and Garlic:**
- In a large soup pot, heat the olive oil over medium heat. Add the chopped onion and minced garlic, and sauté until the onion becomes translucent, typically 3-5 minutes.
**3. Cook the Carrots:**
- Add the chopped carrots to the pot and cook for another 5 minutes, stirring occasionally.
**4. Add Spices:**
- Stir in the ground cumin, ground coriander, ground ginger, and ground nutmeg. Sauté for an additional 2-3 minutes to allow the spices to become fragrant.
**5. Add Broth and Simmer:**
- Pour the vegetable broth into the pot. Bring the mixture to a boil, then reduce the heat to a simmer. Cover the pot and cook until the carrots are tender, which typically takes about 20-25 minutes.
**6. Blend the Soup:**
- Once the carrots are tender, remove the pot from the heat. Use an immersion blender to puree the soup until it's smooth. Alternatively, transfer the soup to a blender in batches, being cautious with hot liquids, and blend until smooth.
**7. Season and Add Cream:**
- Return the pureed soup to the pot and season it with salt and black pepper to taste. Stir in the heavy cream or coconut milk, depending on your preference. If you're using coconut milk, make sure it's well mixed with the soup.
**8. Reheat and Serve:**
- Reheat the soup over low heat, stirring occasionally until it's hot and creamy. Taste and adjust the seasoning if necessary.
**9. Garnish and Serve:**
- Ladle the creamy carrot soup into bowls and garnish with fresh herbs, croutons, or a dollop of sour cream or Greek yogurt.
**Variations:**
- **Spiced Carrot Soup:** Experiment with different spices to create variations. Try curry powder, ground cinnamon, or red pepper flakes for a spicier kick.
- **Ginger-Infused Carrot Soup:** If you love the flavor of ginger, add more ground ginger or freshly grated ginger for a more pronounced ginger taste.
- **Citrus Twist:** Add a splash of fresh lemon juice or orange zest to your soup to enhance its brightness.
- **Vegetarian or Vegan Option:** Use vegetable broth and coconut milk instead of heavy cream for a dairy-free, vegan version of the soup.
- **Texture Variations:** For a chunkier soup, reserve some chopped carrots and add them back into the soup after blending. You can also leave some small bits of carrots for added texture.
**Tips:**
- For a smoother consistency, strain the soup through a fine-mesh sieve after blending to remove any fibrous bits.
- Taste and adjust the seasoning as you go. Adding salt and pepper in small increments allows you to control the flavor.
- Fresh herbs, croutons, or a swirl of cream can make your soup more visually appealing and delicious.
- Serve your carrot soup with crusty bread or a simple green salad for a well-rounded meal.
In conclusion, this creamy carrot soup recipe allows you to create a velvety and comforting dish that's perfect for any occasion. Its versatility and rich flavor make it a wonderful addition to your culinary repertoire. Enjoy making and savoring this classic and nutritious soup!


Monday 3 July 2023

July 03, 2023

Spinach Soup Without Cream // Spinach Soup // Spinach Soup Recipe // Benifits Of Spinach


 Baking And Cooking Hacks


Spinach Soup Without Cream // Spinach Soup // Spinach Soup Recipe // Benifits Of Spinach


Spinach Soup 


This soup is full of goodness and taste. Making healthy spinach Soup at home is really eazy. firstly. Heat the oil in a non-stick pan, add chopped onion and cook for 1 minute until onion becomes translucent. Add copped garlic and cook until it change it's colour. Meanwhile blanch ( a process where a vegetable is cooked in boiling water for 1 to 2 minutes) then remove spinach from the water and put it in ice water bath ( in a bowl add water and ice cubes). This process is very important as it let spinach not to lose its colour. Add spinach to the pan and cook for 1 to 2 minutes and add salt and pepper to taste.Add the spinach mixture into the blender and blend it until a smooth pure. 
Pour the spinach mixture in same pan and boil for 2 minutes. Serve hot! 


Spinach Soup Without Cream // Spinach Soup // Spinach Soup Recipe // Benifits Of Spinach


Spinach Soup

Ingredients

  • 1/2 Kg Spinach 
  • 1 Onion
  •  4 - 5 Garlic cloves
  • 1 tsp Olive Oil
  • Salt to taste
  • Papper to taste
  • Water 4 - 5 cups


Instructions

  • Blanch spinach in large vessel and drain the water from it. 
  • Heat the oil in a non stick pan. Add chopped onion and cook until onion becomes translucent. Add chopped garlic and cook until it change it's colour.  
  • Add blanched spinach in a pan cook for 1 to 2 minutes. 
  • Add the spinach into a blender and it till it becomes into a smooth pure. 
  • Add spinach mixture into the same pan. Add let it cook for 1 to 2 minutes. Add salt and pepper to taste. 
  • Serve hot! 


Tips


  • You can add fresh cream if you are preparing non healthy version of Spinach Soup. 
  • Make sure do not over boil the soup, because it may lose it's nutrients. 


Benifits Of Spinach


Spinach is a nutritious leafy, green vegetable that may benefit skin, hair, and bone health. It is rich in multiple vitamins and minerals.
Spinach is rich in iron, vitamin C and E, potassium, and magnesium. As part of a nutritious diet, it can help support immune function, aid the digestive system, may even have anticancer properties.

1. Prevents Cancer
2. Reduces Blood Sugar
3. Aids in Good Bone Health
4. Aids in Weight Loss
5. Good For Your Eyes
6. Reduces Hypertension
7. Has Anti-inflammatory Properties
8. Keeps Your Body Relaxed
9. Keeps Your Brain Functioning Normally
10. Boosts Your Immunity
11. Prevents Heart Attacks and Atherosclerosis
12. Prevents Anaemia
13. Glowing Skin
14. Prevents Acne
15. Natural Anti-Ageing Properties


Friday 30 June 2023

June 30, 2023

Mushroom Soup For Weight Loss // Healthy Mushroom Soup Recipe for Weight Loss // Mushroom Soup

 Baking And Cooking Hacks


Mushroom Soup For Weight Loss // Healthy Mushroom Soup Recipe for Weight Loss // Mushroom Soup


Mushroom Soup For Weight Loss

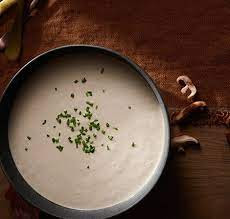
Mushroom soup is completely low carb , good for weight loss,
Learn how to make simple and eazy Mushroom soup.


To make mushroom soup, heat the oil in a pan, add onion and walnuts, saute for 2 minutes becomes translusant. Add  garlic and mushroom saute for 1 minute. Add 1 cup water and cook for 4 to 5 minutes. Remove from the flame and let it cool completely. Once its cooled, pour the mushroom mixture in a blender and blend in a smooth consistency. Transfer the mixture in the same pan, add boiling water to adjust the consistency of the soup. Add salt and pepper to taste. Mix it welland cook for 3 to 4 minutes. Serve immediately.


Tips 

  •  You can use to adjust consistency and to make your soup more creamy.
  • Serve it piping hot


Healthy Mushroom soup              
Ingredients


  • Mushroom Soup For Weight Loss // Healthy Mushroom Soup Recipe for Weight Loss // Mushroom Soup
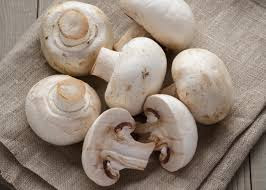
    2 cups sliced mushroom
  • 1 tsp olive oil
  • 1/2 chopped onion
  • 4-5 walnuts
  • 4-5 garlic cloves
  • water 3-4 cups
  • salt to taste
  • pepper to taste

Instructions

  • To make mushroom soup, heat the oil in a non-stick pan, add chopped onion and garlic, saute it. Let it change its colour or become translusent. 
  • Add walnut and saute it for 1 minute. Add 1 cup water and let it cook for 4 to 5 minutes on medium flame. 
  •  Remove from the flame and let it cool completely.
  • Pour the mushroom mixture into the blender jar and blend it untill a smooth pure.
  • Transfer the mixture into the same pan, add water to adjust the consistency of the soup. Add salt and pepper to taste. Let it cook for 3 to 4 minutes, mix it well.
  • Serve the Healthy Mushroom Soup immediately.


Benefits Of Mushrooms


Mushroom Soup For Weight Loss // Healthy Mushroom Soup Recipe for Weight Loss // Mushroom Soup


Mushrooms are a fungus, but that hasn’t deterred most Americans from adding them to meals. According to the U.S. Department of Agriculture, the average American eats approximately three pounds of mushrooms a year. And now there’s even more reason to work mushrooms into your diet.

Mushrooms bring a savory flavor to meals without adding much fat, calories or sodium. But the health benefits don’t stop there. Researchers continue to uncover how mushrooms can ward off chronic disease and improve your everyday health. Read on to discover seven ways that mushrooms can benefit your health:


1. Decrease the risk of cancer


2. Lower sodium intake


3. Promote lower cholesterol


4. Protect brain health

5. Provide a source of vitamin D


6. Stimulate a healthier gut


7. Support a healthy immune system


They also protect against damage from aging and help boost your immune system. Mushrooms are good source of B vitamins, including vitamin B12 (normally only found in animal products). They also contain minerals, including selenium, copper, potassium, phosphorus, zinc and manganese.


Monday 26 June 2023

June 26, 2023

Lime Chicken Marinade / Lemon Chicken Marinade / Grilled Lemon Chicken / Grilled Lemon Chicken / Best Grilled Chicken / Quick salad Recipe

 baking And Cooking Hacks


Lime Chicken Marinade / Lemon Chicken Marinade / Grilled Lemon Chicken / Grilled Lemon Chicken / Best Grilled Chicken

Title: Zesty Lemon Chicken Recipe
Introduction:
Lemon chicken is a delightful and tangy dish that's both easy to prepare and bursting with flavor. The bright and citrusy notes of the lemon complement the tender and juicy chicken perfectly. This recipe will guide you through the process of making a succulent lemon chicken dish that's perfect for any occasion.
**Ingredients:**
For the Lemon Chicken:
- 4 boneless, skinless chicken breasts
- 2 lemons (zest and juice)
- 4 cloves of garlic, minced
- 2 tablespoons olive oil
- 1 teaspoon dried oregano
- Salt and black pepper to taste
For the Lemon Butter Sauce:
- 1/4 cup (4 tablespoons) unsalted butter
- 1/4 cup chicken broth
- 2 tablespoons fresh lemon juice
- 1 tablespoon fresh parsley, finely chopped
- Salt and black pepper to taste
**Instructions:**
**Preparing the Lemon Chicken:**
1. Begin by preparing the chicken breasts. If they are very thick, consider slicing them in half horizontally to ensure even cooking.
2. Season the chicken breasts on both sides with salt, black pepper, and dried oregano. These basic seasonings will add flavor to the chicken.
3. In a mixing bowl, combine the zest and juice of one lemon, minced garlic, and olive oil. Mix these ingredients well to create a marinade.
4. Place the seasoned chicken breasts in a large, resealable plastic bag or a shallow dish. Pour the lemon and garlic marinade over the chicken, making sure all pieces are evenly coated. Seal the bag or cover the dish with plastic wrap and let the chicken marinate in the refrigerator for at least 30 minutes. Longer marinating times, up to 24 hours, will intensify the lemony flavor.
**Cooking the Lemon Chicken:**
5. Heat a large skillet over medium-high heat and add a little olive oil to prevent sticking.
6. Remove the chicken from the marinade and allow any excess liquid to drip off. Place the chicken breasts in the hot skillet.
7. Cook the chicken for about 5-6 minutes on each side or until they are cooked through. The internal temperature should reach 165°F (74°C). Cooking times may vary depending on the thickness of the chicken breasts.
**Preparing the Lemon Butter Sauce:**
8. While the chicken is cooking, prepare the lemon butter sauce. In a separate saucepan, melt the unsalted butter over low to medium heat.
9. Add chicken broth, fresh lemon juice, salt, and black pepper to the melted butter. Stir the mixture and let it simmer for a few minutes, allowing the sauce to thicken slightly.
10. Just before serving, stir in the fresh parsley to add a burst of color and freshness to the sauce.
**Serving the Lemon Chicken:**
11. Once the chicken is cooked and the lemon butter sauce is ready, transfer the chicken to a serving platter.
12. Pour the lemon butter sauce over the chicken, ensuring it's evenly distributed.
13. Garnish the dish with lemon slices and extra fresh parsley for a visually appealing presentation.
**Tips and Variations:**
- For added depth of flavor, consider adding capers or white wine to the lemon butter sauce.
- If you prefer bone-in chicken, you can use chicken thighs or drumsticks with this recipe.
- Serve your lemon chicken with your choice of side dishes like rice, pasta, or a fresh garden salad.
- You can also grill the chicken on an outdoor grill for a different twist on this recipe.
In conclusion, this zesty lemon chicken recipe is a delightful and tangy way to enjoy chicken. The vibrant lemon flavor combined with tender, juicy chicken makes it a perfect dish for both weeknight dinners and special occasions. Enjoy making and savoring this flavorful dish!

Saturday 24 June 2023

June 24, 2023

Fried Chicken / Kentuckey Fried Chicken / KFC Style Chicken / Best Fried Chicken / KFC Chicken


Fried Chicken Recipe


Welcome To Baking And Cooking Hacks 

Hello I'm Sanskruti Chavan a food blogger, from Nagpur, India. Here I'll help you with simple recipes and food hacks


Introduction:

Southern fried chicken is an iconic comfort food loved by people around the world. Its crispy and juicy texture makes it a popular dish for family dinners, picnics and get-togethers. This recipe will walk you through the process of making a whole batch of homemade fried chicken.

Materials:

For chicken:

4 pounds (1.8 kg) chicken (drums, thighs, wings, breasts)
Two cups of buttermilk
2 teaspoons of salt
1 teaspoon of black pepper
1 teaspoon paprika
1 teaspoon of garlic powder
1 teaspoon of onion powder
1/2 teaspoon of cayenne pepper (spiciness setting)
Cooking oil for frying
To cover:

2 cups of all-purpose flour
1 teaspoon of salt
1/2 teaspoon of black pepper
1/2 teaspoon of paprika
Garlic powder 1/2 teaspoon
1/2 teaspoon of onion powder
1/4 teaspoon of cayenne pepper
instructions:

Preparation of chicken:

First, wash the chicken and dry it with a paper towel. If you prefer, you can remove the skin for a slightly healthier option, but leaving the skin on gives it a crunchy texture.

In a large bowl, mix the buttermilk, 2 teaspoons of salt, 1 teaspoon of black pepper, paprika, garlic powder, onion powder and cayenne pepper. This buttermilk marinade helps tenderize the chicken and give it flavor.

Dip the chicken in the buttermilk mixture, making sure it is well coated. For best results, cover the bowl with plastic wrap and refrigerate for at least 4 hours or overnight. This allows the flavors to blend and the chicken to become tender.

Coating and frying:

In a separate bowl, whisk together the flour, 1 teaspoon salt, 1/2 teaspoon black pepper, paprika, garlic powder, onion powder, and red pepper to coat.

Remove each chicken from the buttermilk mixture, drain the excess, and roll in the seasoned flour mixture. Press the flour over the chicken to form a thick, even coating. Place the chicken on a wire rack and let it rest for about 15 minutes. This improves the adhesion of the coating.

While the chicken is resting, heat the cooking oil to 175°C (350°F) in a large, deep skillet or Dutch oven. There should be enough oil to fully submerge the chicken about 2 to 3 inches deep.

Place it carefully


Friday 23 June 2023

June 23, 2023

Chocolate Cake || How To Make Chocolate Cake


Chocolate Cake

Baking And Cooking Hacks


WELCOME TO BAKING AND COOKING HACKS

Hello I'm Sanskruti Chavan, a food blogger from Nagpur, India. Here I'll help you with simple recipes and hacks.

Chocolate Cake

Chocolate cake is a popular dessert that never goes out of style. Whether you're celebrating a special occasion or just craving a sweet treat, homemade chocolate cake is the ultimate indulgence. This comprehensive recipe will help you create a moist and delicious chocolate cake that is sure to impress your friends and family.

Ingredients:

For the cake:
- 2 cups of all-purpose flour
- 1 ¾ cup granulated sugar
- ¾ cup unsweetened cocoa powder
- 1 ½ teaspoons of baking powder
- 1 ½ teaspoons of baking soda
- 1 teaspoon of salt
- 2 large eggs
- 1 cup buttermilk
- ½ cup vegetable oil
- 2 teaspoons of pure vanilla extract
- 1 cup of hot water

For the chocolate frosting:
- 1 cup unsalted butter, softened
- 2/3 cup unsweetened cocoa powder
- 3 cups of powdered sugar
- 1/3 cup of milk
- 1 teaspoon of pure vanilla extract

Instruction:

1. Preheat oven to 350°F (175°C). Grease and flour two 9-inch round cake pans or line the bottoms with parchment paper.

2. Sift all-purpose flour, cocoa powder, baking powder, baking soda and salt into a large bowl. Sifting helps remove lumps and ensures even mixing.

3. In another bowl, mix eggs, buttermilk, vegetable oil and vanilla extract. Whisk them together until well combined.

4. Gradually add the wet ingredients to the dry ingredients and mix until the batter is smooth and well mixed. Be careful not to overmix; stop once the ingredients are combined.

5. Pour in the hot water and stir until it is completely incorporated into the dough. The batter will be runny, but that's totally fine. Hot water helps create a moist cake.

6. Divide the dough evenly between the prepared cake forms.

7. Bake in the preheated oven for 30-35 minutes or until a toothpick inserted into the center of the cakes comes out clean. Exact baking times may vary, so keep an eye on them. Rotate the pans halfway through for even baking.

8. Once the cakes are done, remove them from the oven and let them cool in the pans for about 10 minutes. Then turn them out onto wire racks to cool completely.

9. While the cakes are cooling, prepare the chocolate frosting. In a bowl, beat the softened butter until creamy.

10. Add unsweetened cocoa powder, powdered sugar, milk and vanilla extract to the butter. First, beat on low speed to keep the powdered sugar from flying out of the bowl, then increase the speed and continue beating until the frosting is smooth and fluffy.

11. Once the cakes are completely cooled, you can start frosting them. Place one cake layer on a serving plate or cake stand. Spread a generous layer of frosting on top.

12. Carefully place the second cake layer on top and spread the top and sides of the entire cake with the remaining frosting. Use a spatula or icing trowel to achieve a smooth surface.

13. You can decorate the cake with chocolate shavings, sprinkles or other toppings of your choice for added flair.

Variations and tips:

- For a richer taste, consider using dark cocoa powder.
- To enhance the chocolate flavor in the cake, you can add a spoonful of instant coffee granules.
- Feel free to adjust the topping by adding chopped nuts, chocolate chips or a touch of espresso.

In conclusion, this homemade chocolate cake recipe is a wonderful treat for any occasion. With its moist and decadent texture, it will surely please you. Enjoy creating and sharing this delicious dessert with your loved ones!

About